Monday, 13 June 2016

Array Data Type and Struct Data Type

Array Data Type

1. Array

If we discuss about the array, to be familiar with the basic concepts, we can analogize with the following

example:


Figure 5.1 Illustration image of array in a data value

So it can be concluded that array is a collection of many variables with the same data type, indicated by an index on each element. Functions and main features of the array are storing a series of elements of the same type and has indexes which can be accessed directly or randomly. There are 2 types of array , one dimensional arrays and arrays of two/multidimensional socalled matrix. The difference, multidimensional arrays index has more than one type or the components type are another array form.

1. Step 1 : Array Declaration and Initialization, Forms a variable of type array
first, including the name, size, and content of data type.

   Type name [element];
   or
   Type name [element] =
   {element1,element2,element_n};

for example :


Sequence of value above can be declared using the array type :

   int nilai [6];
   or
   int nilai [6] = {80,90,95,80,85};


2. Step 2 : Accessing Array, Perform operations on each element of the data set individually. Format array access is defined as follows.

   name [index];

For example, to store the value of the second row, 90, of these data, it can be written in the following form
   nilai[1] = 90;
The order of elements in the array always starts from 0, then the value of 90 referred by the first index, while the value of 97 displayed by the third index

read nilai[3];

2. Multidimensional arrays

Matrix, is an array that have 2 or more rows and also 2 or more columns, or more precisely, is an array that is inside another array, depending on how its use. For example, there is a twodimensional array with size 2x2 is shown in the following

example:

Figure 5.2 Illustration of the matrix

For example :


1) Step 1 : Array Declaration and Initialization,
   Type name [rows_element][column_element];
   Int nilai[3][4];

2) Step 2 : Accessing Array,
   name [row_index][column_index];
For example, to store values in the second row and the third column, it can be written as follows


   nilai[1][2] = 80;

To display the values 90 in the third row and the second column can be written as
follows :

   read nilai[2][1];

3. Array of Char

In C++ string data type can be obtained by defining an array of char. Because it is essentially strings is a collection of variable of type char. Although the form of an array, the treatment of an array of type char a little more special. Since there are several functions that can be used to directly manipulate this array. While on an array of non char there is no function to manipulate. Functions for an array of type char is placed in file include string.h.

How to declare a string? Just like with a regular array but the data type is char.
Here's an example

Figure 5.3 Source code example using Array Data Type

The above example is similar to the examples in the previous chapter. Char data type is a kind to an integer data type. Because the char data type is filled by the ASCII characters which encoded with an integer number from 0127. In the first iteration shown that kata1 element is filled with character A (ASCII = 65), B (ASCII = 66), C (ASCII = 66), D (ASCII = 66), and E (ASCII = 66) successively. The output of the above program is:

Figure 5.4 Display of Running Program using Array Data Type

Functions in string.h

Just as with the other include files, string.h is located in / usr / include. We will see what functions are supported by string.h..

/* Copy SRC to DEST. */
extern char *strcpy (char *__restrict __dest, __const char*__restrict __src)
__THROW;
/* Copy no more than N characters of SRC to DEST. */
extern char *strncpy (char *__restrict __dest,__const char *__restrict __src, size_t __n)
__THROW;
/* Append SRC onto DEST. */
extern char *strcat (char *__restrict __dest, __const char*__restrict __src)
__THROW;
/* Append no more than N characters from SRC onto DEST. */
extern char *strncat (char *__restrict __dest, __const char*__restrict __src,size_t __n) 
__THROW;
/* Compare S1 and S2. */
extern int strcmp (__const char *__s1, __const char *__s2)
__THROW __attribute_pure__;
/* Compare N characters of S1 and S2. */
extern int strncmp (__const char *__s1, __const char *__s2,size_t __n)
__THROW __attribute_pure__;
/* Return the length of S. */
extern size_t strlen (__const char *__s) 
__THROW__attribute_pure__;__END_NAMESPACE_STD 

These seven functions is the most widely used for manipulating strings. If you are using Microsoft Visual C++, there are more strings manipulation functions, such as strstr, strupr, and strlwr.

Table 5.1 Default Function to processing words


The above functions can be used in string type. In the previous example, we display the word cout BELAJAR by doing one at a time from the array elements. To be practical, we will change the previous example with the following program :

Figure 5.5 Source code example using Array Data Type

Seen that even though strings is an array but it has a different treatment. Declaration of an array of char as well as filling it, different from the declaration as well as filling of non char array value. the program Output is as follows :

Figure 5.6 Display of Running Program using Array Data Type

Capturing Character Input

Some time we may require our program to capture input from the user in the form of characters. To capture the characters, we can use the same command as capturing input of integer or float. Here's an example program :

Figure 5.7 Source code example to capture character input

The output of the program is :

Figure 5.6 Display of Running Program to capture character input

In the program there are 3 arrays respectively kata1, kata2, and kata3. Then at the 9th row the program ask for input from the user in the form of words. Characters that can be received only 6 units. Although the user enter as many as 8 characters, only the first 6 characters are stored. How to receive user input in the form of character is with the command

   cin >> kata1;

Although kata1 is an array but accessing char array type can omit the index information. This facility specifically for arrays of char only. On line 10 as well . To display a string <array of char> not need to display one at a time, but can display all at once by omiting array index is concerned.

Row 12 shows how to use strncpy function. The contents of the array character copied from array kata1 to larik3 just as much as 3 characters, then display its contents. On line 14 the contents of kata1 and kata3 is compared. But the comparison was limited to 3 characters. The result is a value of 0 which means 'true'. Finally, display the size of the array kata2 which amounted 7 characters.

The conclusion, Ways access an array of char with the non char is different. C++ provides special facilities for an array of char. This is to facilitate programmers of using string data type. Accessing by eliminating the array index. The secret is, every char array that we created is automatically added null character by the C++ which means mark the end of the string..

Like the contents of kata2, by the C++ memory allocation to be :


the last character is the final mark of the kata2 string. Therefore if done cout then C + + will display the contents of the array by looping kata2 until a null character is found. That why array index when accessing array of char can be removed. Because of its benchmark to the null character.

5.4. Exercise
1. Create a program to sumthe numbers that inserted by the user.


2. Create a program to convert decimal numbers into binary. The conversion results can be directly displayed or stored in an array of char variable


Struct Data Type

If in the previous case, namely the array, each component uses the same data type, it is different in a struct that may has components that have different data types. For example, a record of one's data, which consists of names, addresses, ages and department. All data is collected in a single record with the name, address, age, and department as its fields. So this record is an extension of the array data type.

1 Struct declaration

Form of a prior record, covering the fields that are in the record along with the data type for each field.
   struct structName {
      datatype fieldName1;
      datatype fieldName2;
      datatype fieldName3;
   };
   e.g :
   struct StudentRec {
      string name;
      string idNum;
      float gpa;
   };

Form variable with the record type.

   structName variableName;
   e.g :
   StudentRec theStudent;

2 Accessing struct

Perform operations on each element of the individual record. For example, the operation to fill the value of each element. Specific values can be assigned, with the rules to reference field of a record.

   variable_name.field_name = nilai;
   e.g :
   theStudent.name = "Sally";
   or
   cin >> theStudent.idNum;

Show data

   cout<<variable_name.field_name;
   e.g :
   cout<< theStudent.gpa;

3 Nested struct

Elements of a struct can also be another struct. An example can be seen below.
   struct fullname {
      string firstname;
      string lastname;
   };
   struct StudentRec {
      fullname name;
      string idNum;
      float gpa;
   };

4 Array of Struct

Elements of an array can also be a struct. An example can be seen below :
   struct fullname {
      string firstname;
      string lastname;
   };
   struct StudentRec {
      fullname name;
      string idNum;
      float gpa;
   };
   StudentRec theStudent[10];


1. Task 1 : Make a program to store personal information with struct.
   1. Step 1 : Struct Declaration
      struct fullname {
         string firstname;
         string lastname;
      };
      struct StudentRec {
         fullname name;
         string idNum;
         float gpa;
      };

   2. Step 2 : Variable declaration and initialization
      StudentRec theStudent[10];

   3. Step 3 : Process
      int main() {
         cout<<”Masukkan banyaknya mahasiswa : ”;
         cin>>n;
         cout<<”Data mahasiswa”<<endl;
         for (int i=0;i<n;i++) {
                  cout<<”Nama depan : “;
                  cin>>theStudent[i].name.firstname;
                  cout<<”Nama belakang : “;
                  cin>>theStudent[i].name.lastname;
                  cout<<”Nim : “;
                  cin>>theStudent[i].idNum;
                  cout<<”IPK : “;
                  cin>>theStudent[i].gpa;
                  }

   4. Step 4 : Finalization
         cout<<”Data mahasiswa”<<endl;
         for (int i=0;i<n;i++) {
                  cout<<theStudent[i].name.firstname;
                  cout<<theStudent[i].name.lastname;
                  cout<<theStudent[i].idNum;
                  cout<<theStudent[i].gpa;
         }
         return 0;
         }

Figure 6.1 Source code example using struct

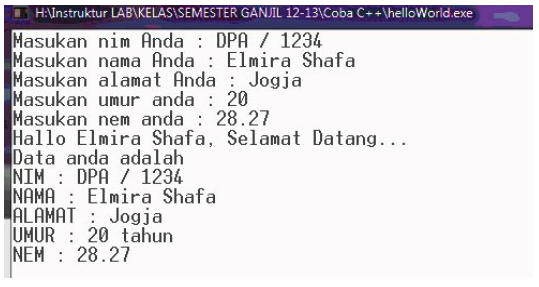
Task 2 : Program compilation and execution

Figure 6.2 Display of Running Program using struct

Exercise

Create a program (by using arrays and structs) which asks the student data (nim, UTS values and UAS value) of N inputs (N is determined by the users themselves, maximum 50), then calculate the average value of each student.

For example :
enter the number of students : 1
enter the nim : 412
enter UTS value : 72
enter UAS value : 74
-------------
nim : 412
average : 73

Saturday, 11 June 2016

Recurrence (Looping)

Recurrence (Looping) - Looping, is section that assigned to conduct activities to repeat a process in accordance with the desired.

The types of looping in C++, among others

  • for, used in a known amount iteration count. (how many times the loop will be done).
  • while, is function to repeat a statement during the condition is true.
  • do-while, almost the same as while loops, but the condition of the do-while loop will be checked after the statement is executed. If the condition is true then the statement is executed again, but if the condition is false, the statement is not executed.


Looping Condition

Conditions used in the iteration has some rules so that there are no error in program. First, the loop condition variable must be of type integer or char. Variable of type float is not recommended though it could. If forced to use a condition variable of type float / fractions, one should check the logic of the conditions carefully.

Especially for loop, the parameters can be removed one, two, or even all of them. But stopping factors should remain there. These factors can be placed in a looping statement.

Nested Looping

Nested looping, is a loop inside another loop. The deeper loop will be processed first until it finish, then the outer loop will be increased, then work again on a deeper iteration starting from the initial value onwards. Looping inside another loop is allowed in almost all programming languages.

Nested looping example can be seen in the following programs:

#include <iostream>
using namespace std;
int main ()
{
   int nested1, nested2;
   int start1 = 1, start2;
   cout << "input nested1 value : ";
   cin >> nested1;
   cout << "\ninput nested2 value : ";
   cin >> nested2;
   if  ( ( nested1 > 0) && ( nested2 > 0) )
   {
      while ( start1 <= nested1 )
      {
         for ( start2=1; start2 <= nested2; start2++)
         {
            cout << "repetition to - " << start1 * start2 << endl;
         }
         start1++;
      }
   }
}

Source code example using While and For Nested looping

In the example above, there is a loop inside another loop. All forms of looping can be put on another looping form. As in the example, for loop was inside the while loop. Statement line 18, will run as many as nested1 x nested2 (according to user input).

Course of the example is as follows. First, the value for nested1 and nested2 variable inserted by the user are 2 and 3. Then if condition will check whether the value of each nested is in positive integer form. If true then the while loop will be executed. Inside the while loop condition will be checked whether the value start1 less than the value nested1 (2). Because the condition is true, statement inside the while loop is executed. Inside the while loop statement, there are loop again, then the looping condition is checked. Is start2 value less than nested2? Because the condition is true then for statement is executed. Which displays a message to the screen repetition to - ...

For statement will be executed until the value of start3 more than nested2 value. In other words the for loop statement, run 3 times. Meanwhile the while loop statement is executed as much as 2x. In conclusion total statement line 28 executed as much as 6x (2 x 3). Program output as follows:

input nested1 value : 2
input nested2 value : 3
repetition to - 1
repetition to - 2
repetition to - 3
repetition to - 4
repetition to - 5
repetition to - 6

Display of Running Program using While and For Nested looping

Using the FOR loop :


1. Task 1 : Creating an algorithm

  • Step 1 : Variable Declaration
    Explanation: Declaring a variable to be used as an index to display the row
    |number 1, for example, i, of type integer.
    i : integer
  • Step 2 : Initialitation
    Explanation: Filling the variable i to the initial value, aims to create a prelooping.
    i <- 1
  • Step 3 : Process
    Explanation: Contains all the parts of the loop that is performed repeatedly. This process is displays number 1 that repeated 6 times. In this step, iteration occurs in the loop, which is an increament condition so that the loop can continue to run.
    for i <- 1 to 6 do
       write ("1")
    end for
  • Step 4 : Finalization
    Explanation: Stoping condition of the loop is very important to prevent the loop that runs continuously.

2. Task 2 : Create the program
  • Step 1 : Variable declaration
    int i;
  • Step 2 : Initialization + Process + Finalization
    for(i=1; i<=6; i++) {
       cout<<”1”;
    }
#include <iostream>
#include <conio.h>
using namespace std;
int main () {
   int i;
   for(i=1; i<=6; i++)
   cout << "1";
   getch( );
   return 0;
}

 3. Task 3 : Compilation and program execution

Display of Running Program using FOR looping

By using WHILE loop :


1. Task 1 : Creating an Algorithm

  • Step 1 : Variable declaration
    Explanation: Declaring a variable to be used as an index to display the row number 1, for example, i of type integer.
    i : integer
  • Step 2 : Initialitation
    Explanation: Filling the variable i to the initial value, aims to create a prelooping conditions.
    i ← 1 ;
  • Step 3 : Process
    Explanation: Contains all the parts of the loop that is performed repeatedly. This process is displays number 1 that repeated 6 times. In this step, iteration occurs in the loop, which is an increament condition so that the loop can continue to run.
    while (i<=6) do {
    cout<<"1".
    }
  • Step 4 : Finalization
    Explanation: Stoping condition of the loop is very important to prevent the loop that runs continuously.
    i ← i+1. -> iterasi
    end while;
2. Task 2 : Create the program
  • Step 1 : Variable declaration
    int i=1;
  • Step 2 : Initialization + Process + Finalization
    while ((i<=6) {
       cout<<"1";
       i=i+1.
    }
#include <iostream>
#include <conio.h>
using namespace std;
int main () {
   int i;
   i=1
   while (i<=6);{
      cout << "1";
      i=i+1;
      }
   getch( );
return 0;
}
 Source code example using While looping

3. Task 3 : Compilation and program execution

Display of Running Program using While looping

By using DO-WHILE loop :


1. Task 1 : Create an algorithm
  • Step 1 : Variable declaration
    Explanation: Declaring a variable to be used as an index to display the row number 1, for example, i of type integer.
    i : integer;
  • Step 2 : Initialization
    Explanation: Filling the variable i to the initial value, aims to create a prelooping conditions.
    i ← 1
  • Step 3 : Process
    Explanation: Contains all the parts of the loop that is performed repeatedly. This process is displays number 1 that repeated 6 times. In this step, iteration occurs in the loop, which is an increament condition so that the loop can continue to run.
    repeat {
       write(“1”);
       i ← i+1;
    until (i=6)
  • Step 4 : Finalization
    Explanation: Stoping condition of the loop is very important to prevent the loop that runs continuously.
2. Task 2 : Create the program

  • Step 1 : Variable declaration
    int i=1;
  • Step 2 : Initialization + Process + Finalization
    do {
       cout<<"1";
       i=i+1;
       }
    while (i<=6);
    return 0;
    }
#include <iostream>
#include <conio.h>
using namespace std;
int main () {
   int i;
   i=1
   do {
      cout << "1";
      i=i+1;
      }
   while (i<=6);
   getch( );
return 0;
}
Source code example using Do-While looping

3. Task 3 : Compilation and program execution


Display of Running Program using While looping

Exercise

1. Create a program to display a sequence of numbers using for loop, while, do. . while
      1 2 3 4 5 6 7 8 9
2. Create a program using for loop, while loop and do-while loop to display rows of letters
      A B C D E F . .
3. Create a program to display stars, within the limits of the amount of numbers that inputed by user, for example, the input limits is 4, as in the following figure


4. Create a program to display multiplication table, as an example:
* 1 2 3 4 5
1 1 2 3 4 5
2 2 4 6 8 10
3 3 6 9 12 15
4 4 8 12 16 20
5 5 10 15 20 25

Thursday, 9 June 2016

Algorithms and Data Structures : Control statement

Algorithms and Data Structures : Control statement - Control statements can made a program more flexible. With control statements we can define the program line to be executed if a condition is met, and is not executed if the condition is not met. There are two control statement in C++. First, we can use if...else statement and the second is to use switch case.

If ... Else

The general form of the if statement is

if (condition)
{
   statement1;
   statement2;
   ....
   statementN;
}

atau :

if (condition)
{
   statement1;
   statement2;
   ....
   statementN;
}
else if (condition)
{
   statement1;
   statement2;
   ....
   statementN;
}
........
else
{
   statement1;
   statement2;
   ....
   statementN;
}

The level of if...else statement can be define as needed. The condition that must be met can be formed from logical operator and relational operator. Logical operators that can be used, among other


SymbolMeaning
&&AND
||OR
!NOT

While the relational operator, among other


SymbolMeaning
==equal to
>=greater or equal to
>more than
<=less than or equal to
<less than
!=not equal to

Sample Program

#include <iostream>
using namespace std;
int main()
{
   int b;
   float amount = 0;
   cout << "enter the value of b = ";
   cin >> b;
   if (b > 10);
      amount = amount + b;
   else
      amount = amount - b;
   cout << "amount = " << amount <<endl;
   return 0;
}

Sample Source Code using relational operators

In the above example if the variables are weighted more than 10 then the statement amount = amount + b will be executed. However, if the entered value equal to 10 or less than 10, then the else statement is executed. Because only one line statement after if then braces can be removed.

The compiler will check if condition. If true, then it will execute amount = amount + b, and skip the else statement. However, if false, then the else statement will be checked.

In designing control statement we should use the number line to make it easier to find true area of each condition. For example, suppose we have the following control statement:

if (b >= 20)
   ....
else if (b < 20) AND (b >= 10)
   ....
else if (b <= 5) AND (b >= 0)
   ....
else
   ....

In above example, there are 4 condition with each number line as follow


The first condition will be checked first before the others. If the condition is true, then the other condition won’t be checked by compiler. However if it false, then the second condition is checked. If it true, then the following condition will be skipped. But if it false, the third condition will be checked. And so on until the fourth condition. This occurs because the control statement are still in one block.

The following example illustrates the importance of using number line if

(b >= 20)
   ....
else if (b < 20) AND (b >= 25)
   .... 

The number line is as follows


There is a regional disparities between the first conditions and the second one. Inequality occurs at b >= 25. If both first and second conditions are meets. Only the statement in the first condition that will be executed, because the first conditions encountered first by the compiler and the second condition was skipped.

Block condition begins with the word if, and ends with the words else or new block condition. for example

if (condition)
   ....
if (condition)
   ....
else if (condition)
   ....
else if (condition) AND (condition)
   ....
else
   ....
if (condition)
   ....
else if (condition)
   .... 

In the example above there are three blocks of control statement. Block 1 is the first row, block 2 is the line 25, and block 3 is the line 67. Block condition different with nested control statement. Each block has a equal position.

Here's an example of a nested control statement

if (condition)
{
   statement;
   ....
   if (condition)
      statement;
   else if (condition)
      statement;
   else if (condition) AND (condition)
   {
      if (condition)
         statement;
      else if (condition)
         statement;
      else
         statement;
   }
   else
      statement;

The example above has a different block control statement. But the three blocks of control statement is not the same level. The third block is part of the second block and the second block is part of the first block.

Another Sample Program

#include <iostream>
using namespace std;
int main()
{
   int input;
   cout << "insert day to- = ";
   cin >> input;
   if (input == 1)
   {
      cout << "you enter Sunday";
   }
   else if (input == 2)
   {
      cout << "you enter Monday";
   }
   else if (input == 3)
   {
      cout << "you enter Tuesday";
   }
   else if (input == 4)
   {
      cout << "you enter Wednesday";
   }
   else if (input == 5)
   {
      cout << "you enter Thursday";
   }
   else if (input == 6)
   {
      cout << "you enter Friday";
   }
   else if (input == 7)
   {
      cout << "you enter Saturday";
   }
   else
   {
      cout << "not input the day/wrong input";
   }
   return 0;
}

Source code example using Conditional IF

This example will be compared with the switch ... case control statement.

Switch ... Case 

Switch ... case control statement can only be used in condition using equal relation. In the last if ... else example, all the condition use equal relation. Therefore, we can use switch ... case instead of if ... else. Examples are as follows.

#include <iostream>
using namespace std;
int main()
{
   int input;
   cout << "insert day to- = ";
   cin >> input;
   switch(input)
   {
      case 1 : cout << "Sunday";
      break;
      case 2 : cout << "Monday";
      break;
      case 3 : cout << "Tuesnday";
      break;
      case 4 : cout << "Wednesday";
      break;
      case 5 : cout << "Thursday";
      break;
      case 6 : cout << "Friday";
      break;
      case 7 : cout << "Saturday";
      break;
      default : cout << "not input the day/wrong input";
      break;
   }
   return 0;
}

Source code example using Conditional CASE

switch ... case simplifies repetitive writing if else and conditions. Typographical errors can be reduced. In addition checking the conditions would become easier. There are additional commands ie break. It used to get out of the switch statement if one of the conditions have been met. With the break, when one case is met then the other cases below are not checked. Therefore, with the break we could distinguish whether the condition is still in a block or not.

Default is the replacement of the previous examples else. If no conditions are met then the default will be executed.

In a different example

#include <iostream>
using namespace std;
int main()
{
   int input;
   cout << "insert day to- = ";
   cin >> input;
   switch(input)
   {
      case 1 : cout << "Sunday";
      case 2 : cout << "Monday";
      case 3 : cout << "Tuesnday";
      case 4 : cout << "Wednesday";
      case 5 : cout << "Thursday";
      case 6 : cout << "Friday";
      case 7 : cout << "Saturday";
      default : cout << "not input the day/wrong input";
   }
   return 0;
}

Source code example using Conditional CASE DEFAULT

Since the break in each statement is omitted, then the blocks of each condition will be expanded include blocks of the underlying condition. If any of these conditions are met then the statement on the underlying condition will be executed as well. For example we inputing 4, then the output will be rabu kamis jumat sabtu bukan input hari/salah masukan, all five from condition 4.

Exercise
1. Create a program that can convert a number value that the user inputted into the value of the letter, with conditions:

  • The value of 85-100, got A.
  • The value of 70-84 got B. 
  • The value of 40-69 got C. 
  • The value of 20-39 got D. 
  • other than that got E. 

2. Create a program to determine the greatest number of 3 pieces of numbers inputted by the user.
for example:
enter the 1st number: 15
enter the second number: 7
enter the third number: 22

Tuesday, 7 June 2016

Algorithms and Data Structures : Sequence

Algorithms and Data Structures : Sequence - Algorithm is a sequence of one or more instructions or statements, and each statement is done sequentially in the order of writing. Which is:

  1. Each instruction is done one by one 
  2. Each instruction executed exactly once (no instruction is repeated) 
  3. Each instruction executed in the same order as it written in the algorithm 
  4. The end of the last instruction is the end of the algorithm. 

For example, suppose we have two cup, say cup A and cup B. Cup A contains coffee and cup B is milk. If we want to switch the content of the two cup, milk on A and coffee on B. How are we going to do that? Consider the following algorithm:

  1. Move the content of cup A to B 
  2. Move the content of cup B to A 

What is going on here? Is that solve the problem?
No, we do not solve the problem. We do not exchange the contents of the two cup but mixing both contents. In the end, cup A contains milky coffee while cup B is empty.

Then, what is the right algorithm? Here we need additional cup, say cup C, to temporary hold the content of cup to avoid mixing the contents. Thus, the algorithm will be:

  1. Move the content of cup A to C 
  2. Move the content of cup B to A 
  3. Move the content of cup C to B 

What about now? First we move coffee from cup A to cup C, which is empty, thus not mixing it. Then move milk from B to A, which is also empty after the first step. And finally, move coffee to cup B. In the end, milk in cup A, coffee in cup B, as expected, and cup C is empty. That solve the problem.

So to switch two cups content, we need an additional cup. Is that all? Consider the following algorithm:

  1. Move the content of cup A to C 
  2. Move the content of cup C to B 
  3. Move the content of cup B to A 

In above algorithm, in the end, cup A content milky coffee, cup B and C is empty. We use additional cup as the second algorithm. Then why the result was the same as the first algorithm? We see that the sequence of the second and the third algorithm was different. On the second algorithm we move content B to A, before we moving content cup C to B. While on the third, we move content B to A after moving content C to B.

So, to solve a problem not only we need right technique, but also the right sequence.


A similar problem on a programming algorithm is when we want to swap the contents of two variables, as this code:

//We want to swap the contents of the following variables
int x = 10;
int y = 33;

So what we need is an auxiliary variable to temporarily store the data of the variable

//Need 1 auxiliary variables
int z = 0;

 If we print the contents of all the variables in the initial stages, it will be found the following results

Initialization
x = 10
y = 33
z = 0

The first step in doing this is to move the value of the variable x to variable z.

//move the value of x to var z
z = x;

The contents from each variable after this process is as follows

The first exchange of x to z
x = 10
y = 33
z = 10

The next step is to move the value of the variable y to variable x

//move the value of var y to var x
x = y;

So that each variable would be

The second exchange y to x
x = 33
y = 33
z = 10

The final step is to move the value of the variable z to the variable y

//move the value of var z to var y
y = z;

so the result of this step is the solution of the initial problem, that is

Last exchange z to y
x = 33
y = 10
z = 10

Here's the entire code, and the output of the above issues

#include <iostream>
using namespace std;
int main()
{
   //We want to swap the contents of the following variables
   int x = 10;
   int y = 33;
   //Need 1 auxiliary variables
   int z = 0;
   cout << "initialization" << endl;
   cout << "x = " << x << endl;
   cout << "y = " << y << endl;
   cout << "z = " << z << endl;
   //move the value of x to var z
   z = x;
   cout << "\nthe first exchange of x to z" << endl;
   cout << "x = " << x << endl;
   cout << "y = " << y << endl;
   cout << "z = " << z << endl;
   //move the value of var y to var x
   x = y;
   cout << "\nthe second exchange of y to x" << endl;
   cout << "x = " << x << endl;
   cout << "y = " << y << endl;
   cout << "z = " << z << endl;
   //move the value of var z to var y
   x = y;
   cout << "\nlast exchange of z to y" << endl;
   cout << "x = " << x << endl;
   cout << "y = " << y << endl;
   cout << "z = " << z << endl;
   return 0;
}

Swapping Variables Value Source Code

Initialization
x = 10
y = 33
z = 0
The first exchange of x to z
x = 10
y = 33
z = 10
The second exchange y to x
x = 33
y = 33
z = 10
Last exchange z to y
x = 33
y = 10
z = 10

Swapping Variables Value Programs When Running.

Sunday, 5 June 2016

C++ : I/O and Implementation of I/O

Accuracy in the processing of the problem lies in whether the results are in accordance to requirement or not (valid or invalid). To get the expected results, it should be considered the input, process, and output.

The performed Operation on the input is to read data or value that will be processed. The value of a variable can be early defined in the program or entered by the user from the keyboard by using the existed functions of the library in C++ programming language.

Unlike the operation on the input, the output operation is done to transmit or display data or value to the output device (output device), such as a printer or screen (monitor). Examples of ouput operation is displaying the sentence to the screen, that usually is done to show commands to enter an input into the program, or display the value of a variable to the monitor by using the existed libraries of C++ programming language, also usually done to show the results of a calculation or the result of a solution . In C++ iostream library, standard input and output operations for programming are supported by 2 data streams: cin for input and cout for output.

Standard output (cout), the use of cout stream is coupled with overloaded operator << (A pair of the "less than").

Example :

cout << "Output Sentence"; // print the output sentence on the screen.
cout << 120; // prints number 120 on screen.
cout << x; // print the contents of the variable x on the screen.

Operator << is also Known as the insertion operator, which is used to yield the data that follows it. If a string, then it must be enclosed in double quotes ("), so is unlike with the variable.

Example :
cout << "Hello"; // prints the output phrase Hello on the screen.
cout << Hello; // prints the content of Hello variable on the screen.

Operator insertion (<<)may be used more than 1 time in the same sentence, for example: cout << "Hello, " << "Good " << "Morning"; ”The above example will display Hello, I am a C + + sentence on the monitor screen. Benefit from the repetition use of insertion operator (<<) is to display a combination of one or more variables and constants,

Example 1 :
cout << "Hello, My Age" << Age << "Years and I class of" << class of;

For instance, age variable is filled with the value 18, and the class of variable is charged with 2016. Then the result of output is:

Hello, umurku 18 tahun dan aku angkatan 2012

Example 2 :
cout << "First Setence.\n "; cout << "Second Sentence.\nThird Sentence."; 

Then the resulting output is:
First Sentence.
Second Sentence.

Third Sentence.

Beside the newline character, can also use the endl manipulator, for example:
cout << "First Sentence. " << endl;
cout << "Second Sentence." << endl;

Output :
First Sentence.

Second Sentence.

Standard input (cin), its use by adding overloaded extraction operator(>>) on the cin stream that followed by variable that will store the data.

Example:

int Age;
cin >> Age;

The above example declares 'Age' variable in type of int and wait for input from cin (keyborad) to be stored in the Age variable . Cin command will process the input from the keyboard once and the ENTER key must be pressed.The cin can also be used for more than one input:

cin >> a >> b;

Equivalent to :

cin >> a;
cin >> b;

In this case the data in the input should be 2, one for variables a and the other for b which are written separated by: space, tabular or newline.

Usually cout (standard of stream output) is intended to the monitor and cin (the standard of stream intput) is intended for the keyboard. By using these two streams, then we can interact with the user by displaying messages on the monitor and receive input from the keyboard.

Implementation of I/O

Example for implementations of I/O (Input Output), which is a program used to receive input from the students namely nim, name, age, address, and NEM values and displays each of student data themselves to the screen.

1. Task 1 : Create a student data program.

  • Step 1 : Declare the variables used and their data types.
    Explanation: The variables that are used to display process of the students data themselves namely the variable nim, name, and address that each of them are variable of char data type, these difference only in size. Variable age of integer type, and nem variable of float type because it consists of a value that requires number precision after the decimal point.
  • Step 2 : Initialization.
    Explanation: Because the program receives direct input from the user, then it may not be given early initialization.Giving early initialization is adapted to the needs of the processed case.
  • 3) Step 3 : The process of solving the problem.
    Explanation: Reading input from the user by using cin function, and displays the results to the screen using cout function.
  • 4) Step 4 : Finalization.
    Explanation: Stopping the main() function is by using the return 0 command.

#include<iostream.h>#include<conio.h>using namespace std;int main(){   char nim[20]; char name [20]; char address; int age; float NEM; //variable declaration   cout << "input your nim : "; //show to the screen   //cin.getline(nim,20);   gets (nim); //accept input is nim variable   cout << "input your name : ";   gets (name);   cout << "input your address : ";   gets (address);   cout << "input your age : ";   gets (age); //accept input is age variable   cout << "input your NEM : ";   gets (NEM);
   //show results to the screen
   cout << "Hello" << nama << ", Welcome . ." << endl;
   cout << "Your data is : " << endl;
   cout << "nim : " << nim << endl;
   cout << "name : " << name << endl;
   cout << "address : " << address << endl;
   cout << "age : " << age << " years" << endl;
   cout << "NEM : " << NEM << endl;
   getch();   return 0;}
finalization Sourcecode

2. Task 2: Compile and Execution

running programs display


Exercise

  1. Make summation program for two value by using input numbers from the user when program run.
  2. Create a program to calculate the time taken based on the given speed and distance by using the input by the user.
  3. Create a program to consider a number is odd or even.
  4. Create a program to determine a number is prime or not.
  5. Create a program to calculate the area of a circle.

Wednesday, 1 June 2016

Implementation C on Dev C++

Create a new project in a Linux OS 

Programming in C++ on the Linux operating system using g++ software%% GNU C ++. This compiler can be automatically installed when installing the Linux operating system if we selected the option to install g++.

Compilation by using g++ is done in the Linux console (terminal). How that is done is, at the first please type C ++ source file in a text editor and then saved as a file with extension. Cpp,. Cp, cxx, c ++, cp, or cc (example: try1.cpp). Then place it in the folder home / <username> user>. Type these command

g++ <path/name file.cpp> o <file output> 

Example : g++ try1 –o output1 (then press enter).

The file path is not required when we first go into the folder where the source file is stored. Output file may not be given, however by default, g++ will create the output file named a.out. In this example if there is no error then the compilation will produce (output) binary file in the name of output1.

Once the compilation is done, check whether the compilation was successful by looking at the results of compilation messages. If there are any error messages then the output file has not been established yet. We need to do editing source (via text editor) and then compile it again. Another way to check if the compilation was successful by entering the folder where the source files are stored, and type the command

ls or dir

If the output file that we define or file a.out has appeared , then compile successfully. Conversely, if the file has not appeared yet, it means the compilation is fail. Execute the output file can be performed by typing the command .

/<name file output> 

Example : ./output1

This above command allows us to see the results of the program have been made.

Create a new project in devc + + in Windows OS

Step 1 : In C ++ application, select File> New Project > New Source File

Display of new projects

Step 2 : Type the code in the work area

Display of source code

Task 3 : Compilation and Execution of program 1) 
Step 1 : Select the Execute menu> Compile

Display of compile program

Step 2 : Select the Execute menu > Run

Display of the running program
Exercise 
  1. Make summation program for two value by using input numbers from the user when program run. 
  2. Create a program to calculate the time taken based on the given speed and distance by using the input by the user. 
  3. Create a program to consider a number is odd or even. 
  4. Create a program to determine a number is prime or not. 
  5. Create a program to calculate the area of a circle.
C++ : Basic Data Types (Integer, Real, Character, String, Boolean) - In the Beginning of the discussion of programming, we will first use the basic data types including data type integer, real, char, string and boolean.

Data type is the data type based on the content and it's characteristic. For example, the same analogy with the case of the daily is gallon of water which just made to accommodate certain types of objects with the objects type is liquid, such as water.

The types of basic data types of programming, such as:Integer, integer type commonly called as an integer, but the integer type does not only consist of an integer, there are other types such as short and long, which distinguishes these three types is its range number.


  • Real, this type is used to declare value that requires precision numbers with the values behind the comma(fraction value behind decimal point). Such as: double, single, float. 
  • Char, the type of data used to store a character. 
  • String, the type of data in the form of a collection of characters (one or more) that lies between two quotation marks (") in C. 
  • Boolean, data types are used to express the statement is true (true) or incorrect (false). 


Reach of each data type are different either of the scope or value of the programming

Range of data types


Basic TypeRange of PointsDigit of Precission
Char-128 to +127-
Int-32768 +32767-
Long-2.147.438.648 to +2.147.438.647-
Float3,4E-38 to 3,4E+386-7
Double1.7E-308 to 1.7E+30815-16
Long Double3.4E-4932 to 1.1E+493219

Variable are places to store data of a specified type whose contents can be changed according to the type. Each of variable can only store a single value. So if the value is changed, the previous value is replaced with the new value. Whereas the constant actually is a variable defined by default value at the beginning, and is typically not changed. Variables and constants must be declared in order to the program can allocate a memory to accommodate the specific data and process it in the program to obtain the appropriate output. C++ Language has support variable declarations as well as initialization, for example, is :

string tablebrands[5]={"adidas adizero Indonesia","adidas climacool Vietnam ", "adidas f50 China "}; //array declaration in 5 array,
//Each array capable of storing strings
tablebrands[3]="Nike mercurial Indonesia"; //initialize each array
tablebrands[4]="Nike Air Vietnam";

Actually the initialization is also called as an assignment that means the process of inserting values into variables with the help of the operator (=). From the above example , the assignment process is entering the data string (character set) into each of tablebrands array [0] unto array tablebrands [4].

Constants are similar to variables, but has a fixed value. Constants can contain values of interger, float, character, and string. Constant declaration can be done in two ways:

Ø Using the (#define) 

Constant declarations in this way will be easier to do,because includes a preprocessor directive # define. And this syntax is put together with the # include statement (above main ()). The Syntax format is:

#define identifier value
Example of application:

#define phi 2.414159265
#define Newline ‘\n’
#define width 100

Declaration for # define is without featured by = notation to enter a value into the identifier and also without ended by a semicolon or (;) notation

Ø Using constants (const) 

With the const keyword,the declaration is similar to a variable declaration plus coupled with the"const" word and initializated immediately.

Example:

const int width = 100;
const char tab = ‘p’;
const zip = 912; 

For the last example, the declaration of variable zip is without data type, then the compiler will automatically enter it into the type of int.

Implementation of Data Type 

The most important step in early making a program is to declare a variable that will be used and the type of data type, then do the initialization of these variables, then defines the problemsolving processes that can be kind of calculation formulas or instructions and other commands. Declaring a variable and its data type in C++ language can be seen in the following steps:

1. Task 1 : Make the sum of two integers:

  • Step 1 : Declaration of the variables Explanation: The variables that are used to process the sum of two integers are a and b . Therefore, two numbers are processed are integer, then the type of data used in the variable a and variable b is an integer
  • Step 2 : Initialization Explanation: Initialize the variables a and b is assigning initial values for the two variables that will be used. 
  • Step 3 : Process Explanation: Contains the sum process. 
  • Step 4 : Finalisasi Explanation: is the step to end the program, including display the results to the output devices (screen), and return 0 is used to terminate and return a value, because of our program use INT (see the main function), hence this needs the return value. Then we use return 0 in order to avoid misunderstanding between us with the program.
#include <iostream>
using namespace std;
int main () {
   //variable declaration :
   int a, b;
   int results;
   //initialization
   a=5;
   b=2;
   //process
   results=a+b;
   //show results to the display
   cout << results;
   getchar ();
   //stop program
   return 0;
}

2. Task 2 : Compile & Execute program.

Display the results of the program

C++ : Operator (Arithmetic Operators, Operator of Relation, Operator Increment & Decrement, Operator Bitwise, Logical Operator, The assignment operator, and Operator of condition) - To process a more complicated processing sometimes we need a symbol or a sign to treat some variable which is called as operator.

Operator is a symbol or a sign that if put between on two operands can yield a result, for example in the mathematical plus sign (+) when placed between two other numbers will produce accretion results rate of two numbers. Plus(+) sign is called an operator. The operator has several types as follows:


Arithmetic Operators


OperatorDescriptionExample
+Addition(Sum)a+b
-Subtractiona-b
*Multiplicationa*b
/Divisiona/b
%The rest of division (modulo)a%b
-Negation-a

Negation operator () is called an unary operator, as it can requires only a single operand, while the operator% (modulus) is used to search the rest of the division between the two numbers.

Example : 9 % 2 = 1, 9 % 3 = 0

Operator of Relation


OperatorDescriptionExample
==Equal toa == bis a equal to b
!=Not equal toa != bis a not equal to b
>Greater thana > ba greater than b
<Less thana < ba less than b
>=Greater than or equal toa >= ba greater than or equal to b
<=Less than or equal toa <= ba less than or equal to b

Operator Increment & Decrement


OperatorDescriptionExampleActual expression
++Incrementa++a=a+1
--Decrementb--b=b-1

Operator Bitwise


OperatorDescriptionExample
<<Shifts n bits to the left (left shift)a >> b
>>hifts n bits to the right (left right)a << b
&Bitwis ANDa & b
|Bitwise ORa | b
^Bitwise XORa ^ b
~Bitwise NOT~ b

Logical Operator


OperatorDescriptionExample
&&Logical ANDa && b
||Logical ORa || b
!LOgical NOT!b

In the above logical operators are often used in selection or looping conditions, for example:

If ( (a+b>c) && (a+c>b) &&( b+c>a))
while(x>=’f’ || x<=’c’)

The assignment operator '=' should not be used in conditions of selection or looping .
Here the example:

if(a=b+4) // wrong syntax,
if(a==b+4) // TRUE

written syntax. On statement 'for' i also found the assignment but not on its condition, but only on the part of forward or backward counter. Example:

for(int i=0; i<=9; i=i+2) // , i=i+2 not lied in the condition beacuse separated by sign (;) // But the part that states the condition is on (i <= 9)

Operator of condition

Operator of condition is notated by notation ‘?’ that used to obtain the value of two
possibilities:

expression1 ? expression2 : expression3
When value of expression1 = true, then the value is equal to expression2, otherwise is equal
to expression3

Tuesday, 31 May 2016

Introduction to C++ 

Introduction to C++ - Armed with the basic concepts of algorithms and programming, so we can further learn programming  language that we will use in this time  to learn the  C++ programming language. The solutions of the problems that we face need to be mapped into the algorithmic language to make it more easily understood in the form of the programming language used. Then algorithmic  language is mapped  into C++ in accordance with the structure of C++ programming language.

The C++ programming language was the development of the C programming language as its predecessor. The term of C++ is often known as "C with Classes" bacause the programming language C++ has supported  object­oriented  programming as well as Java programming language. All the existing  library on the C programming language has also been included in the C++ programming language.


The compiler is a software that used to change the program code (source code) into machine language (binary file) so it can be executed by the computer. The program will be able compiled if the program contains no errors at all in its rules (syntax error). Examples for popular  C/C++ compiler are MinGW and GCC, the compiler usually has been packaged/bundled  with its IDE software (Integrated Development Environment). IDE software  is an  integrated  interface with facilities including a compiler for creating or development of the program. The popular and opensource C/C++ IDE Software that are Codeblock, Dev C++, and Sublime (for Mac OS)

The C++ Programming language has case sensitive characteristic, which means the compiler distinguish uppercase  and lowercase letters, for example, if we write printf and Printf in the C language, the C compiler will consider both of the texts are in different meanings. In practical of C++ programming language today, we are going to use Dev C++ IDE which also as the open source compiler program.

The parts that support the making of a program created by the C++ language programming, there are: 


  • Comment, is part of the  program code  which not executed  by the  compiler. Comments are  considered  importantly to  clarify the  program to be  more  easily understood  and  provide  information  on specific  parts of program code.  By commenting, our program can be read easily by other to be developed further. Usually without comment, people will be hard to understand the flow of the program code that been  made, therefore  the  comments are  needed in  order  to make our code  more informative.
  • Identifier, the  name  given by the  programmer (the  person who make the  program). Naming an identifier can be used in the program name, the name of the function, or other  objects that involved  in  the  programming  language, such as variable  names, constants which will be discussed further.
  • Keywords are  specific  words that contain  special meaning  contained  in  the  programming language. In C++ programming language, which called as keyword are asm,instance,  class, delete,  friend, inline,  new, operator, private,  protected, public, template, this, virtual, etc.. The words are  considered  as keywords according to the standard of a programming language should not be used as an identifier name.
  • Library of function, in contrast with the keyword, function library is a library that contains the functions provided by the C ++ language in the header files or the library. The functions are used to perform a particular tasks. Functions are grouped according to the type also characteristic and stored in a file with extension .h . For example,  a function cout which  is stored  in the library file iostream.h , used to print on the screen. Default functions of the C language, for example, printf from the stdio.h library can also be used in C++ if we write #include <stdio.h> at the beginning of the program.

Program structure

// my first program in C++
#include <iostream.h>
using namespace std;
int main () {
cout << "Hello World!";
/* It is also a comment line */
return 0;
}

Hello World!


  • // my first program in C++ , is a comment line that begins with two oblique sign (/ /) or are enclosed in / ** / and has no effect on the program. In this case, this comment line is used to describe a piece of code ever made.
  • #include <iostream.h> , preceded by a sharp mark (#) or, this line is a preprocessor line. In this case, #include <iostream> states to include iostream standar file. This particular file includes the declarations of the basic standard input­output library in C ++ language. Functions that commonly are used by beginner programmers of the iostream.h library include: cin, cout, system ("pause").
  • using namespace std;, this line tells the compiler that the program is written using standard C ++ library. Sometimes with the using namespace std; programmer does not need to write the (.h) on writing the standard C++ library.
  • int main () , this line is a main ()function. This line is at the core of the program that may include variables, assignment statements, or commands. This line consists of a series of source code that begins with the opening brace { and closing brace } and mark {} means showing where the main ()function begins and ends or the so­-called code blocks. So when a function is called, the content where enclosed by a block of code to be executed.
  • cout << "Hello World!"; this line is a statement of C++. A statement is a simple expression that can produce several effects. Cout represents the command of standard output in C++, cout is declared in the iostream standard file within the std namespace. So this line of code used to display the phrase "hello world".
    *Notice that the statement ends with a semicolon character (;). This character is used to mark the end of the statement and must be written at the end of all expression statements in all C ++ programs .
  • Return 0;, return instruction causes the main ()function terminated and returns the code that follows the instructions, in this case is 0. This is the most commonly used to end the program..